Tuesday, November 30, 2010

Apple Pork Rib Soup & Braised Sesame & Ginger Chicken

I'm making 2 dishes today as a really good friend of mine, Bryan is coming over for dinner and Soup would not be enough. :P

Are you feeling under the weather lately?  Perhaps having a persistent cough that is not going away.  Well, then you HAVE TO try the Apple Pork Rib soup.  The secret ingredient for this soup is Chinese southern sweet almond  (南杏).  It is said to be soothing for your lungs.

Ingredients for Apple Soup

Apples about 5 (Cut and remove core)
Pork ribs
Pork Marrow bones
Chinese Southern Sweet Almonds
Salt

Ingredients for Braised Sesame & ginger Chicken

1 whole chicken
1 small can of button mushroom
2 carrots
Thumb size of Ginger (sliced)
3 garlic
Dark Soy sauce (You can use oyster sauce instead too if you don't like the black look of this dish)
Sesame Oil
Sugar
Chinese rice wine
Water

How to make Apple Pork Rib Soup

Soak pork ribs/bones in water to remove blood


Cut apples into chunks, remove core

Put everything in a pot, add water and BOIL on low for at least 3 hours till all the flavour is in the soup and the pork bones are so soft the flesh falls off the bones.

How to make Braised Sesame & Ginger chicken


Slice Ginger and chop up garlic, Cut chicken into small pieces with bones on.  Cut carrots into bite size pieces

In a pot, add Sesame oil, heat it.


Throw in Slice ginger and garlic, Stir fry till fragrant.


Add in chicken, stir fry till almost cooked and covered with sesame oil.

Add in Carrots and mushroom.  Simmer for 2 mins

Add in dark soy sauce, enough to coat all the ingredients in the pot.  Not too much as it will be too salty.

Let it simmer for 1/2 hour, Lid on.  Stir it occasionally to ensure all the chicken pieces are covered evenly with dark soy sauce.


Add some water.  Depends on how much gravy you want.  Sprinkle in some sugar.  Close lid and simmer for another 1/2 hour.

Before serving add a dash of chinese rice wine.  Simmer for 5mins.

Serve both dishes with  a  hot bowl of Rice.


Bon Appetit
Monica Eng
Singapore

Monday, November 29, 2010

Fried "Hey Bee Hiam" Flat rice noodles aka Fried Spicy Dried Shrimp Noodles

This is another recipe that I used to love so much which my mum made.  I believe it's of Penang origin.

"Hey Bee Hiam" direct translates to Spicy dried Shrimps.  It's a kind of condiment that you can use for almost anything.  I use it for frying noodles, rice, vegetables or just eating it with plain rice porridge.  I love it on hot toast too.  It's one of the most versatile condiment that I know.

As always, recipes from my mother does not come with exact measurements.  You're free to use as much as you like, and keep the balance in the fridge,  how much chilli, salt, sugar or shrimp you use really depend on how spicy, sweet or salty you want it.

Ingredients for "Hey Bee Hiam"

Dried Shrimps aka "Hey Bee"
Shallots
Chilli
Chilli padi - Bird's eye chilli (Add this if you want it to be spicier)
Sugar
Salt

Ingredients for noodles

Lean Pork slice
Choy Sum or bean sprouts
Fish Cake
Flat rice noodles
"Hey Bee Hiam"

Method for cooking "Hey Bee Hiam"


Soak dried shrimps in water for about 30mins.

Peel shallots, soak in salt water to prevent tearing.

Cut up chilli padi and chilli

Blend ingredients together (U can use a pestle and mortar if you have the energy)

Add oil in wok, heat.  You'll need quite a bit of oil as the flossy dried shrimps absorb them up really fast.
 

Pour all ingredients into wok and stir fry on low fire.  Keep stirring as it gets burned quite fast.

Add salt to taste.

When the colour of the mixture darkens, add sugar.


Keep stir frying till it's kinda dark orange in colour.   Scoop it up and set aside.

When it's ready the fragrance is really strong.  That's how you tell.  The smell kinda change after some time of frying.


Method for frying the noodles

In the clean wok, add oil.  Heat.


Add Pork to stir fry till it's almost cooked.  Add Fish Cake

Add "Hey Bee Hiam"

Mix them evenly, add some water cover, Simmer for a while.

Add vegetables (Cut choy sum thick stem to small pieces) , Mix them evenly.  Cover for a little while till vege is cooked.


Add Flat rice noodles and fry everything evenly.  Make sure the noodles are well coated with "Hey Bee Hiam"

Add soy sauce to taste if it's not salty enough.

Keep stirring to prevent noodles from getting burned.

Serve with some extra sprinkle of "hey bee hiam" on the noodle


Bon Appetit
Monica Eng
Singapore

Tuesday, November 23, 2010

Apple Crumble... (literally crumbles...)

My mum loves cooking and baking and she used to bake alot when I was younger.  We didn't have any electric mixer during those days and she used to hand beat her cake batters.  And I remembered how much I loved the sound of hand mixed batters.  And I look forward to it all the time.

Apple Crumble is one of the things she baked often.  It was also one of the first thing I learnt from her.  She never had a fixed recipe, everything was an estimation.  And as usual she'd make too much pie crust and crumble, she'd remix them together and let me shape my own cookies with the left over dough and I had lotsa fun doing it.

I do not have measurements for the recipe below as how much you use really depends on how big your baking tray is.

Ingredients for crust


Flour
Butter (salted)  - I used a bar here
Milk
A little salt


Ingredients for crumble

Flour
Butter (1/2)
Sugar
Ground almond

Ingredients for apple filling

10 Green apples (Again depends on how big/deep your pie tray is)
Sultanas (I prefer yellow)
Sugar
optional (Cinnamon stick)

Making the Pie filling


Wash apple, Skin them and soak in salt water to prevent it from oxydising

Skin and remove core of apple, cut them into slices


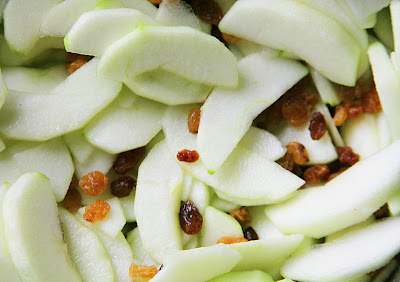
Drain the apple slices, add in sultanas and marinate it with sugar and 2 sticks of cinnamon (Cinnamon is optional)

Leave it for 30mins - 1hour

Making the Crumble


Add salt and butter to flour, rub in ingredients till it resemble bread crumbs.  Add milk, form a dough.


Roll dough out and adjust it into the buttered pie tray.

Making the Crumble

Pour flour, sugar, ground almond and butter into a bowl


Rub-in ingredients till it resemble bread crumbs.  Use finger tips as you do not want the butter to melt too much.

Preheat oven at 170 degree celsius


Lay the marinated apple slices and sultanas without the water nicely on top of the pie base.

Sprinkle Crumble on top of apples

Bake for 30mins at 150 degree celsius

Then another 30mins at 170 degree celsius.

I used too much butter for the crust today and my apple crumble came out really crumbly.....But taste good still!  Well anything with THAT much butter taste good!!  :D


Bon appetit
Monica Eng
Singpore

Sunday, November 21, 2010

Fettuccine with Feta cheese, Ouzo and Prawns

Hey :)

My friend Marilena came over so that we can make the second pasta recipe as promised in my previous post. We decided that we wanted to use prawns and ouzo. Ouzo is really sweet so we wanted something salty to balance the flavor. We thought that feta cheese will help us achieve that.

Ouzo (ούζο) is an anise-flavored aperitif that is widely consumed in Greece and Cyprus. Similar aperitifs include Oghi from Armenia and among Western Armenians, pastis (France), arak (from the Levant) and raki (from Turkey) although, in Greece, raki is generally not anise-flavored. Its aniseed flavor is also similar to the anise-flavored liqueurs of sambuca (Italy) and patxaran (Bilbao, Spain) and the stronger spirits of absinthe (France) and a variation of Mastiha (Chios, Greece). It can be consumed neat or mixed with water. (wikipedia)

Feta (Greek: φέτα) is a brined curd cheese traditionally made in Greece. Feta is an aged crumbly cheese, commonly produced in blocks, and has a slightly grainy texture. It is used as a table cheese, as well as in salads (e.g the Greek salad), pastries and in baking, notably in the popular phyllo-based dishes spanakopita ("spinach pie") and tyropita ("cheese pie") and combined with olive oil and vegetables. It can also be served cooked or grilled, as part of a sandwich or as a salty alternative to other cheeses in a variety of dishes.

According to the relevant EU legislation, only those cheeses produced in a traditional way in some areas of Greece (mainland and the island of Lesvos), and made from sheep's milk, or from a mixture of sheep's and goats’ milk (up to 30%) of the same area, may bear the name "feta".
However, similar white brined cheeses (often called 'white cheese' in various languages) are found in the eastern Mediterranean and around the Black Sea. Similar white cheeses produced outside the EU are often made partly or wholly of cow's milk, and they are sometimes called 'feta'. (wikipedia)


Ingredients:
Serves 4

1 pack of Fettuccine
1 kg King Prawns
Oil
150 ml Ouzo
150 ml Fresh Creme
Feta Cheese
Vegetable stock
2 Tomatoes
2 Onions
White Pepper
Salt if necessary

Method:

Cook the paste as indicated.
Wash the Prawns really well and remove their intestines
Cut the onions and tomatoes into small pieces and put them in a pan with some oil and cook until soft.
Add the Prawns in the pan and cook until they become pink
Add the Ouzo and leave it to boil.
When the liquid is almost gone, add the Vegetable stock and the fresh creme
When it starts to boil add the pepper and the feta cheese in small pieces until it melts
Leave it until the sauce becomes thick
Taste it and add some salt if you think it needs it
Add some parsley if you want after its done


Enjoy!!!
Mary
Cyprus
xxx

Saturday, November 20, 2010

Spaghettoni with Lountza or Bacon and Green Peppers

I wanted to do something with pasta for the weekend so I prepared two recipes for you. This is the first one, which I attempted to create something without thinking too much. I just wanted to go with the flow while tasting it in the process.

So here you are:

Ingredients:

Serves 4

Spaghettoni or any other Pasta you prefer
1 pack of Lountza* or Bacon
1 big Green Pepper or 2 small ones chopped
1 big tomato or 2 small ones chopped
1 garlic chopped finely
pinch of chilli
oil
pinch of salt only for the milder version of Lountza
pinch of pepper
pinch of sugar

*Lountza (Italian Lonza) is made from the pork tenderloin. After the initial brining and marinading in wine, it is smoked. Although it can be aged, many prefer younger, milder lountza. It is often cooked over coals or fried with eggs as well as a sandwich filler or part of a meze. Stronger than lountza and made from the leg, is chiromeri, which is similar to any smoked, air-dried ham from Southern Europe, although the wine flavour makes it characteristically Cypriot. In non-mountain areas, the same meat used for chiromeri is cut into strips along the muscle compartments and dried in the sun as basta.

For this recipe I wanted to use aged smoked Lountza or Chiromeri, it is much better because it's really salty, but that's my preference, others prefer to use the milder version of it. For this case though i didn't have the aged version, so I used a milder one.


Method

You cook the Pasta as indicated.

For the Sauce, first you have to put the Lountza in the pan with no oil and stir until it becomes really hard. For the milder version, stir until golden brown.

Add the tomatoes and green peppers and a bit of sugar and oil just to enhance the taste of the tomatoes.
Stir for 5 minutes and then add the rest of the ingredients.

When the sauce starts to become thick then its ready.


Enjoy!!
Mary
Cyprus
xxx

Thursday, November 18, 2010

Jjajangmyeon 짜장면 (Korean Egg Noodle with Black Bean Sauce)

Before i visited Korea, my idea of Jjajangmyeon was Instant noodles.  It was simple and easy to cook and i could eat it everyday with a side serving of kimchi (김치) or danmuji (단무지) or better still, both.  I was easily satisfied.  


Then in September, I made my maiden voyage to South Korea.  And was introduced to a little restaurant off Myeongdong for what 김철수 claims to be the BEST jjajangmyeon ever!  We ordered seafood jjajangmyeon  (해물짜장면).  It was heavenly.  The sauce was perfect, the noodles had the right elasticity.  I was in heaven.  


After returning I thought about that jjajangmyeon frequently, I visited several restaurants in hope to find the same taste, but was deeply disappointed.

So after much research I've decided to cook this dish today.

A little history about this noodle. Jjajangmyeon was first created in a little chinese restaurant in the city of Incheon in the 1950s.  Jjajangmyeon is called one of the "national foods" of South Korea.  It has been by far the most popular delivery food in Korea, and almost every Chinese restaurant in Korea has Jjajangmyeon on its menu.  As of March 2009, six million servings of Jjajangmyeon are sold in South Korea per day, and it was chosen as one of the top 100 "Korean cultural symbols" by the South Korean Government in 2006.

In South Korea, there is a recently established tradition that singles eat jjajangmyeon on BLACK DAY, which is April 14.  


Do you know that there is even a book published about Jjajangmyeon?  Titled "A Story of Jajangmyeon" (짜장면 뎐), the book was written by Yang Se-uk, a research professor of chinese language and literature at the Hanyang University.  It's preface is as solemn and heroic as the introductory part of a martial arts fiction: "Towards the end of the 19th century when Korea and China were both seeking modern diplomatic relations, jajangmyeon silently crossed the Yellow Sea and stealthily landed on the Korean peninsula.  As a result of groping blindly in the dark for a half century, jajangmyeon's black charm finally captivated the Korean people in the mid 20th century"

Well, now that you know so much about jjajangmyeon, lets start with making the Home-made egg noodles.  I decided to make the noodle from scratch as I was told that it's best when noodles are fresh and has a certain elasticity.


Recipe for Egg Noodles (

2 cups of plain flour (Each cup serves 2 person) 
2 eggs (beaten)
2 tsp of salt  (I tried 1 but not salty enough)
1/4 cup of water (u might need more or less depending on how big your egg is)


The ingredients are approximate, you have to learn the feel of the dough as you knead.


Beat the eggs with salt, make a well in the flour and pour egg mixture in.


Mix with a pair of chopstics, add water slowly and continue to mix.  You may need more or less, but add just enough for the dough to come together.  Don't add too much otherwise it will be too soft after resting and would be very difficult to handle.


The dough will seem hard initially.  Knead it into a ball, let it rest for about 10mins.  Then start kneading it for another 10-15 mins (warning: expect sore arms and fingers later in the night)  If you have a strong man at home, make him do this job.  He will be happy with the muscles he get from this fabulous exercise.


Let it sit for 30mins, then go back and knead it for another 10-15 mins again.  Keep doing that for a few time.  The more you do this the more chewy the noodles will be.  The dough will soften as u knead more. 


Flatten the dough, divide it into 2 for easy handling.


Flour your work table and the rolling pin.  Roll the dough out as thin as you can without breaking.
Sprinkle more flour on the flattened dough.  Fold it over and roll it very thin again.


Finally, fold it over a few times. Remember to sprinkle flour in between before folding.  Make sure the ends is shorter then your knife for easy cutting.   Cut them into thin strips.  Well, if you like thicker noodles u can cut them thicker.  I like them just the way i had them at Myeongdong. :D


Loosen the noodles and powder them in a tray to prevent them from sticking.  You can use cornflour for this.


Boil a big pot of water.  Put the noodles in a portion at a time.  Too much noodles and too little water will make the noodle gooey.  When the noodles float, they are ready.  Get the noodles out as quick as possible with a metal sieve.  Drain it then put it in a bowl, put some olive oil in the noodle and mix it well, tat is to prevent them from sticking together.  But cook the noodles only when your sauce is ready.


Recipe for the Jjajang (Black bean sauce)


Olive oil
300 grams pork belly, cubed (if you are health conscious you can chose a leaner meat)
7 tablespoons black bean paste (해찬들된장) You can buy this from the Korean supermarket.
1 cup Radish, cubed
1 cup sweet potatoes, cubed
1 cup zucchini, cubed
1 cup carrot, cubed
2 cups onions, cubed
3 cups water
1 tablespoon sugar
2 tablespoon refined rice wine
starch water (mix 2 tablespoon of corn/potato starch with 2 tablespoon of water)
1 cucumber sliced into thin strips, for garnish
slices of Danmuji 단무지 (korean pickled radish, comes in white and yellow) 


Wash pork with with cold water.  Marinate it with 1 tbs of refined rice wine, 2 pinch of salt, a sprinkle of pepper and some ginger juice. Mix well.


Fry the pork in the pan without oil, the pork belly will give you enough oil.  Fry till it's slightly brown, remove and set aside.  Discard pork oil.


Add some olive oil in the wok and put in the onions, fry till translucent.  Add in potatoes, radish and carrots.  Fry it for a bit.


Add zucchini and sweet potatoes.  Fry it for a while, leave it on low fire.


Add 3 cups of water till the ingredients are submerged.  Cover and simmer for 20mins


In a seperate pan, add a little oil, stir fry the black bean paste on medium heat for about 1-2 mins.


Open lid of vegetable and pork wok and skim off the foam.


Discard oil and add bean paste and refined rice wine and stir up till it's well mixed and black.  


Simmer it abit more till everything is cooked.   (Taste the potato to check if it's cooked)


Add the starch water slowly into the wok, stir while you do it.  Add enough till the soup turns into a sticky sauce.  Add 1 tbsp of sugar to taste.  Adjust this to your liking.  

Serve the sauce on your noodle.  Garnish with sliced cucumber and serve with a few slices of danmuji (pickled radish)  Few slices is usually not enough.  It's too good.  


To make it PERFECT......accompany it with a glass of Makgeoli (Korean Rice Wine)  or Hite Beer. :D